Posts

Showing posts from October, 2019

Plants and trees of Mars! Part 2

Image
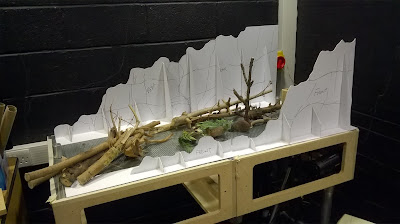
When I began to bring down all the boxes of fake plants, model railway litchen and potpourri I saved over the past 10 years, I realized I needed help making the plants. I knew that due to size of my set I wasn't going to need many plants but I didn't want to repeat what I had made years before. I enlisted the help of my friend Amy Callaghan who had some experiences with prop making but was a excellent listener and followed instructions. She took what I explained about how I envisioned a prehistoric Mars to be like and what I imagined the plants to be like, the following photos are what she came up with in one day!

Plants and trees of Mars! Part 1

Image
I now had to tackle making the vegetation of Mars, I wanted to tackle the trees first as they would the most important things to see on screen before the details of the wooded area becomes clear to the viewers. Unlike my 2004 version of a prehistoric Mars, I wanted to have consistency with my trees, where as before I used found dried sticks on the floor, this time I would use one straight branch and cast it to make resin copies. This was a lot harder than I had envisioned. For starters I did not have access to the right materials for making the mold walls, so I had to make do with a plastic board (which I would later regret using), once the mold walls where sealed with hot glue and the mold floor was fixed in place I mixed up the silicone; I could only do so much at a time in quantity as the mixing pot was not big enough. Literally half way through the third silicone pour the sides of the plastic board split the hot glue and silicone poured out onto the floor, I'm still unsur

Storyboarding, changes in time!

Due to time quickly running out I have made some minor and major alterations to my storyboard in order to make sure I can still come out with a finished film. The alterations made were for the following. Modern Mars ROV... Originally this was going to be a somewhat lengthy sequence with a narration from Tom Baker (who's agent sadly turned down the offer) but the main run of the visuals didn't feel right for me, so rather than making it a science accurate introduction, I took liberties (inspired from Ray's First Men in the Moon and Gerry Anderson's work) and redesigned the ship to feel more like something you would find on a kit bashing project and the landing on Mars to reflect something similar to George Pal's War of the Worlds. Even the ROV has been designed around elements of classic robot sci-fi designs and shapes. Introduction to Prehistoric Mars... Whilst some people enjoyed seeing these characters come into the shot and go about their daily routine an

Balancing act: Magnets Vs. Tie Downs

Image
If there has been one problem ANY stopmotion puppet fabricator or animator has to endured over the past 100 years is how to keep your puppet secured to the floor and stopping them from falling over. I remember Ray Harryhausen telling me how on Mighty Joe Young, Willis O'Brien tested a new tie down system where a hook would be inserted into the foot and attached to a steel bar which it would lock the foot into place, sadly it was discovered the foot wasn't truly locked to the floor and would shuffle around on the animation rushes so this technique was quickly abandoned. What is the purpose of a tie down though? A tie down is basically a engineered way to cheat gravity while acting as gravity. In term of sculpture, a model requires certain key points designed to take the strain of gravity pulling the object back to the floor, tie downs do exactly the same thing.  There are two forms of tie down, the threaded rod and the magnetic (which tend to use the rare earth versio

Hands... putting the finger on Wire vs Joints?

Image
I've been in a little bit of a dilemma lately, when it comes down to making the hands for the X-Rex I've been torn between making them either in wire or in ball and socket joints... here my problems. Wire finger Pros. Can be cheap Flexible Easy and quick to make Countless option to make with copper and wire variations Wire finger Cons. They eventually break Need to make multiple copies for quick replacements Attention to details with notes of wire combinations that work for specific purposes. Ball and Socket Pros. Long lasting Can give atomically perfect joints Ball and Socket Cons Sizes must be exact in order for them to work Need tightening over time of use. Not cheap Hard to source Can be fiddly to assemble the smaller you go Take into account the size of the ball, the plate thickness and the size of the screw needed I'm torn because making the fingers as ball and socket would not only reflect the type of jointed fin

"Safety Pickle" Acid Salt... How to use it and loose it when working in Armature Fabrication.

The number one question I get asked when talking about ball and socket armatures is "how do I make a armature?" but the second most popular is "how do I make it clean?" well, thats when your introduced to Safety Pickle! Vitex Safety Acid Pickle is a crystallized acid that is used in the jewelry profession for cleaning metals after they have been exposed to high temperatures. Safety pickle isnt strong (so don't worry about it melting through your flesh and tables, its not Xenomorph blood) but it is harmful to organic, synthetic materials and the environment. I hope this blog post is going to inform you of the golden rules of using it and how to dispose of it safetly and professionally. How to use it. To start with you need to acquire you pickle, you need to go to a specialist for this, I purchase mine from cooksongold, and normally only need a 500g tub of the stuff. you must familiarize yourself with the units required to make the pickle effective; in this

Silver Soldering... Teaching the BA Animation 1st and 2nd Year stop-motion students.

Image
This particular post is to try help explain to students about techniques and "rules" of ball and socket armature fabrication. All these opinions are based on parts from Animation Toolkit, but there maybe some forms of advice that can translate into other armature products or techniques. Clean your parts in acetone - Swilling  your parts around (not shaking) will remove all the factory grease and grim from the metal which if not removed can contaminate the soldering process resulting in no bonding or deformed solder. You may also find some small fragments of metal lodged in parts that have been previously machined, make sure to remove these at this stage of the soldering process. Fresh metal is the best metal - file or sand the area you want to solder, fresh metal surfaces make for better bonding of solder. Rod lengths and finishes - there are three methods of soldering for rods, the first is threaded: which hold the rod inplace if its also being inserted into a threa

Building the Martain set... The Real Deal! Part 2

Image
Now that the set is all dry I can begin painting, this is more to my strength as I have been painting real rock textures on my fossil magnets via my etsy shop, even if the paint materials are different, the texchiques are more or less the same. It was quite tricky to try and find a good reference for how to paint my martian surface, I couldn't use photos from Mars expositions as this wouldn't reflect a true "earth like" planet. so I turned to looking for desert terrain on earth that might be considered to be martian like. Luckily I found one such photo and it was a great reference for both smooth hills and gravel flat surfaces.   First off I had to get a base coat of Burnt Umber down, to give a reddish brown and then I could apply lighter colours and build those up to give the illusion of age and weathering. in the photo on the left, I experimented with dry brushing in a small area to see if the textures I had would have been useful for highlighting

Building the Martain set... The Real Deal! Part 1

Image
Now that I have worked out how big the set if going to be I can start to plan one the 1:1 scale model Using black mount board to build the skeleton for the cliff walls. I will strongly suggest you don't use mount board, as I will explain in the next section, its not ideal. Use something that won't flex under heat or pressure, like plywood. Applying expanding foam to create the main body of my cliff walls, this is a technique I found online. overall its a great technique, however the amount of holes from the gas pockets it creates is less than ideal for turning into a rockface. I had found another method that uses poly board, aka wall insulation, and the results I had seen using that technique looked much better, but due to my lack of budget and time this method seems fine. Once the expanding foam had set I could carve into the foam the rock textures. As mentioned above I soon found out that this method was not going to be a perfect fix, the amount of holes cre