The build-up method, or foam fabrication to you new puppet makers!
For years I have wanted to have a second stab at the build-up method for making my stop-motion puppets, back in 2012, Ray Harryhausen told me my build up technique was wonderfully done, but I could see the flaws in my work even back them, the second time round, I wanted to be a little more careful with it, but not take to long in making it.
One big help to me was a book by my friend Richard Svensson "My Stop-Motion Monster Puppet Menagerie" which the opening of the book tells readers how he make build-up puppets. His level of puppet making is a true skill to behold, you can find his work, along with how to videos on his YouTube channel Bluworm.
This was a better insight for me into making my newer puppets, where as previously I was making my puppets on pure guess work. Though I did not have time to make my puppets as detailed as his, it was nice to see what could be achieved from his photos had I the time to learn how to make them.
This was a better insight for me into making my newer puppets, where as previously I was making my puppets on pure guess work. Though I did not have time to make my puppets as detailed as his, it was nice to see what could be achieved from his photos had I the time to learn how to make them.

I started with the Xenotyranuus Rex model, as I was more familiar with the anatomy I wanted to use for it than I was with the Alloceratops "ceratopcian" design, but I alternated between puppets during periods where the glue needed to dry properly so I could be more productive.
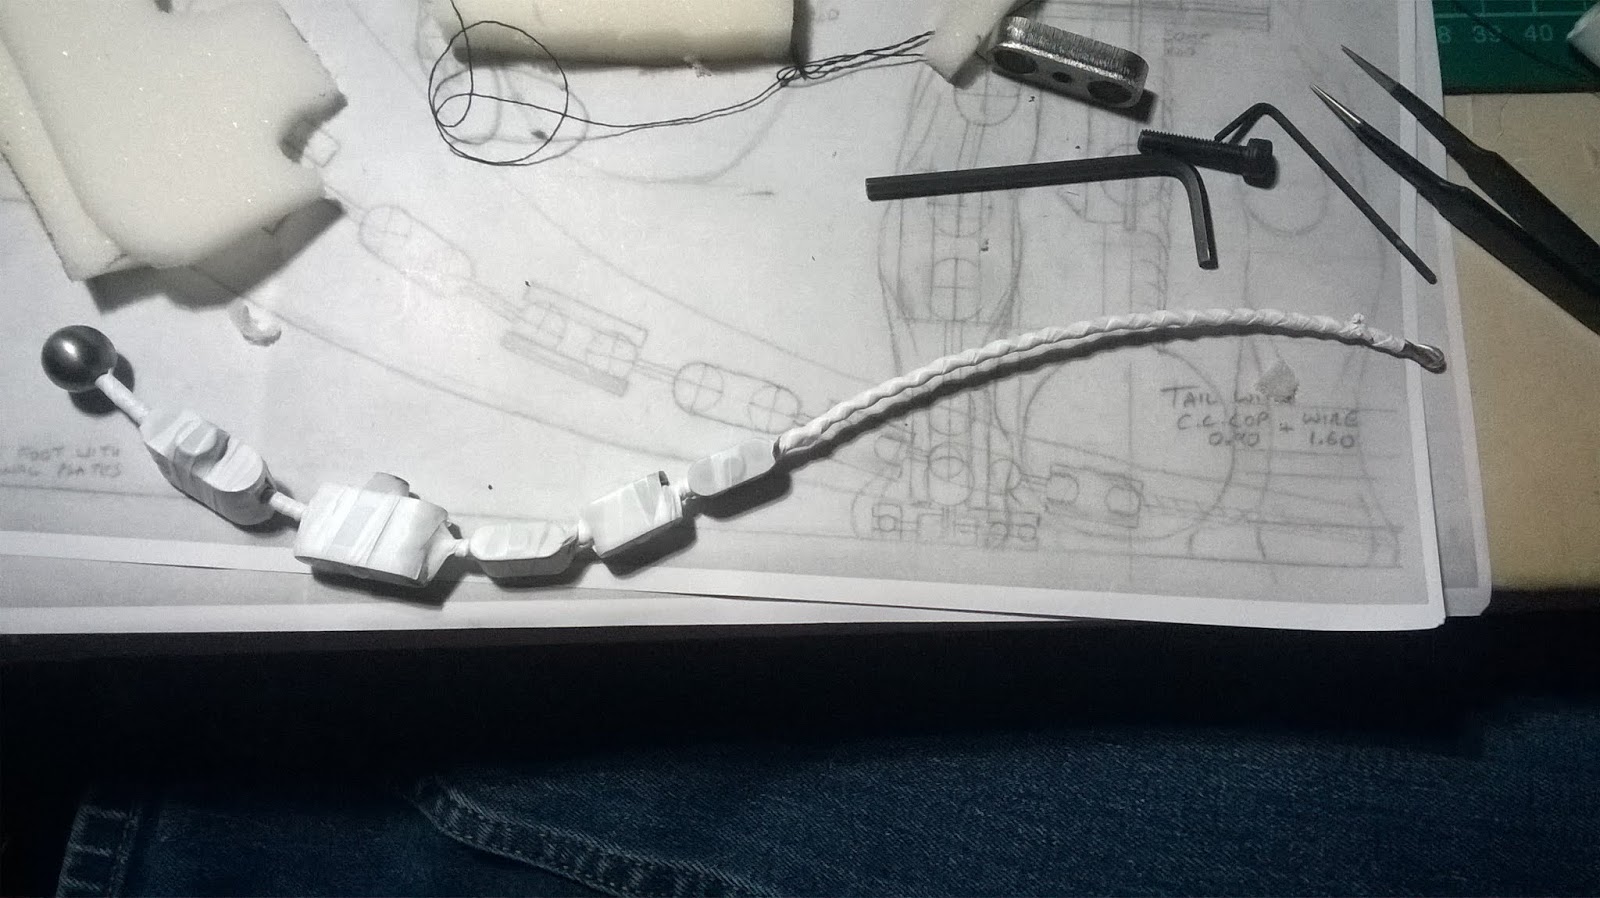

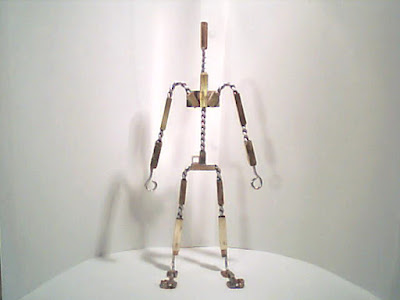
First I covered all the joints with PVC tape, a trick I learned down in Ireland whilst at Telegael (and thankfully reminded of by Jim Young from Aardman). The idea behind doing this is to stop silicone or clay getting into you joints causing them to clog up and prevent movement, for me I wanted to make sure none of the upholstery foam was going to snag in any of the joints. Hopefully the principle works well but I wont really tell until I get to testing the puppets through test animations.


Then I could start applying the foam to the armature. I made sure to only apply glue to key points where the armature flexed whilst leaving areas that required stretching to be free for movement. The best glue I found for this was Evo-stik Impact Adhesive glue, its best to use this in a well ventilated room. Additionally, use cotton wool yarn to hold foam peices in place as they dry, and to fill out areas such as fingers, toes and tails.


Once the foam was glued down I could then start to shape the foam with either craft scissors, nail scissors or a soldering iron, depending on what tool was required for each part.


One thing I will say though is prepare for form shaped with a soldering iron to me sticky, its best to use this a last resort as the residue from the melted foam can contaminate your latex or silicone materials. The plus side of using a soldering iron however means you can taper off the edges and crudely sculpt the foam (as I did with the ear).


I also made the X-Rex's toe nails (and the Alloceratop rear hooves) out of Milliput, this wasn't my original material choice, I had planned to buy some car body filler to apply, sculpt and sand to a preferred finish, however time and budget would not allow for this. I am happy with the results however, they're just not as durable as the body filler would have been.
For the Alloceratops, I needed to make eyes, but I didn't want to use dolls eyes, I wanted something a little more unusual, like the eyes of a octopus or a cuttlefish. I developed many eye designs back in 2004 taking inspiration from nature, settling on three types of pupil, a "comma" shape, a "V" shape and a sideways "W". In the end I went with a V shape but it soon became clear I should have probably scaled the Iris up when designing the eye ball. But it still works I think.
I applied 3 layers of epoxy glue to create the jelly like layer of an eyeball and drilled a 0.05mm hole so I could insert a pin into the eye for movement, ideally I would have preferred to have used a rubber tipped pencil like Ray used to use, but sadly the socket was not spherical enough for controlled movements.


One more piece I had to work on was the eye brows and eye lids for the Alloceratops. For the eye brows I drilled a hole in a presculpted location just above the eye socket and threaded a peice of double up aluminium wire which had been wrapped up in cotton thread. For the eyes I used a single stand of aluminum wire folded into a V-shape and inserted loosley into two predrilled holes either side of the eye socket, in hindsight I should have wrapped the wire in a thin strand of cotton thread so the latex had something to bond to during the latex half of the build.
Now that the foam has been applied and shaped I can begin to apply the skin. On my 2012 prototype puppet I applied the latex directly to the foam which worked OK in some areas but in others it was applied to thickly and folded unnaturally when bent. This time round I wanted to use skin patched made from a plaster mold. I sculpted a patch of skin to match the head I had made earlier and softened the edges using lighter fluid. Once the piece was set I made other template paces to make scutes, keratin scales and skin using some fake leather.
(In hindsight, some of these pieces worked quite well, others did not, which could be down to the way I sculpted them, the thickness of the latex, the mixture of the latex, the way I had applied them, or all of the above.)
Now to all I had to do was pour the plaster onto the pieces and allow it to set. It should be noted that while you can make lego walls to put your plaster into, the water does seep out through the gaps between the bricks, but it does leave the plaster behind, I would advise anyone doing this to at least make sure the water is either collected into a towel or cloth surrounding the mold or have it drain into a tray to evaporate away.

Once the plaster had dried and I had removed the plaster I set about mixing the latex. Back in 2005 I was taught to mix gouache paint with de-ironised water before applying it to the latex, the water broke down the paint to allow it to mix into the latex without clumping up. One thing I was not sure about however was the mix ratio for the three parts, to much water would break down the latex when dried, to little and the paint would not mix well. I think I found a good measurement (after some time animating though I have found it may have been too watery) and could now start to sponge the pigmented latex into the plaster mold.


It takes some time to figure out how many layers is thick enough for the skin patches, I found 3 layers to be about right in the end, however you will find that you go through your sponges like crazy due to the latex curing in the sponge, so I advise you have plenty of cheap sponges at the ready and to allow each layer to dry using a heat lamp, using a hair dryer can be used but it must be on a low setting other wise ripples will appear in the latex as it dries.


once the layers are dry, dust off with some talcum power and remove from the plaster mold. try to stack the skin sheets in a way that they dont stick to each other otherwise you could end up ruining a latex sheet.


When you think you have enough layers of skin you can begin to apply them to the puppet. I found using a little but of latex around the edge of the skin patch to be most effective, and would use the heat from my hand to dry out the area I wanted to bond. I did find it a little hard to make sure I had the skin placed in a area that required more flexibility than other areas, but I think I managed to do well under the circumstances.
Looking back on things I would change, the scutes on the back of the X-Rex should not have been cast as one piece and should have been places as individual pieces, only because when flexing the tail, neck and ankle joint, the latex folds in a unnatural way to my eyes.
Once all the patches where in place I could begin applying the paints, I knew I didn't have time to make the paint schemes I wanted to use or the tools to hand to apply it via air brush (which I did in 2004) so I opted to go with sponging the under belly areas and striped banding colours on the puppets.

For the X-Rex I decided to go for a Orca colour scheme and pattern, thinking back to what Ray had told me in 2012 "but if its blind why does it need to be colourful?" which lead me to looking at naturally blind animals and found only a small percentage of them retained colour in their skin, so I felt it fitting that a Orca's predator nature, using echo location to communicate and hunt and "looking" like it was a blind animal (how many of you don't look at the white spot on the head an automatically register it as an "eye")

For the Alloceratops I wanted to keep to a basic camouflage design, a bulk of the body being brown and then broken up with a creamy underbelly and black stripes to break up the body shape. loosely based on Zebra where though the animal stands out of its habitat, the camouflage hides the number of animals are in a heard.
For painting the milliput and resin parts I used Humbrol's enamel paints using bry brushing, washing and stipple effects to highlight any sculpted details, the interior of the mouths I made sure to use a gloss finish to simulate the wetness of saliva.

After rigorous testing the finished puppets, the skin work fairly well except for a few minor gripes that bother me.
Due to the latex being diluted for the pigment to mix well, the structural strength of the latex is limited, and I am always having to make minor repairs to the latex before a small hole become a huge tear that would be noticeable on camera.

Thanks for your kind words about my book. Most important; your own very detailed puppet-making how-to is excellent and a joy to read!
ReplyDelete