Building the Martain set... The Real Deal! Part 1
Now that I have worked out how big the set if going to be I can start to plan one the 1:1 scale model


 Sadly the plaster bandage covered up much of the detail I had carved into the foam, and trying to apply "realistic" texture to the surface using filler didn't go to plan at all. It looks OK, but not to the degree I had pictured in my mind.
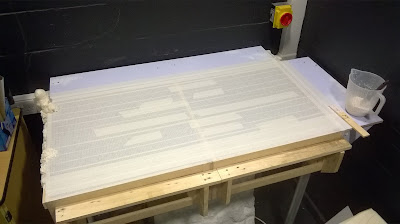

Before I got too carried away, I decided to cover the base of the set with a masking tape base so I could apply a pva water paper mache paste on the top to enable me to detail the table surface without damaging the steel table top. I have also added extensions to the tables edges so I can maximize the surface area I can animate on without being covered by set pieces.


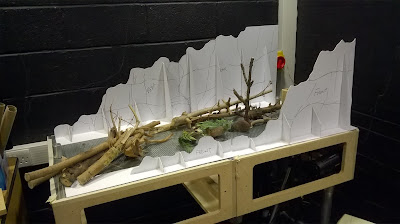
The set is starting to take shape, I am now starting to add the front cliff where the short films climax will take place. If I had more time and funds this would have been extended this down to the floor but this is all I could afford to do.

 I had to use just filler on the front cliff face, but once this is dried, I can begin painting and building the trees and bushes for set dressing.

Using black mount board to build the skeleton for the cliff walls. I will strongly suggest you don't use mount board, as I will explain in the next section, its not ideal. Use something that won't flex under heat or pressure, like plywood.

Applying expanding foam to create the main body of my cliff walls, this is a technique I found online. overall its a great technique, however the amount of holes from the gas pockets it creates is less than ideal for turning into a rockface. I had found another method that uses poly board, aka wall insulation, and the results I had seen using that technique looked much better, but due to my lack of budget and time this method seems fine.


Once the expanding foam had set I could carve into the foam the rock textures. As mentioned above I soon found out that this method was not going to be a perfect fix, the amount of holes created from the foam mix was quite severe, the small ones I knew I could fix with filler, but some of the larger ones (big enough to fit 2 fingers in some places) would require more than my purchased filler, more than I could budget for. So I had to opt for using plaster bandage instead.


I then made a extension piece to further disguise the square shape of the table edge. In hindsight I should have looked through a camera lens to check the height of the rocks so they wouldn't obscure the table top too much.


Applying the plaster and filler process whilst on set, this was to ensure the set pieces sat flush to the animation tables edge.


Comments
Post a Comment